Right, here goes... This turns out to be quite tricky.
Firstly, I have to assemble the FR tube onto the mounting plate. I had a couple of goes at this, because getting the levelling screws a) level (!) b) at the right height was a bit tricky. This also involved running the cable through the tube and blocks, which required an additional reaming with the 5mm drill bit to straighten the holes up.
 |
| Initial FR tube mounting on plate |
Running the FR wires through the block is tricky, and adds to the complexity of putting the nuts and washers on the retaining bolts. But...
 |
| Attachment bolts with FR wires, showing tightness of spot! |
After that the wire needed to be run through the hole in the coupler - this was also a bit hard! The wire is not very bendy and needs eventually to turn at right angles a) at the exit from the mounting plate b) on the inside of the coupler, after it's come through the side.
 |
| View of FR wire transit from mounting plate to coupling |
Of course, I aligned the speaker terminals with the rear of the coupler, right where the FR wires come through... this increased the level of difficulty by about 5! But eventually I coaxed it into place, and worked the 1m of wire through the hole.
 |
| FR wires enter right beside Woofer speaker terminals!! |
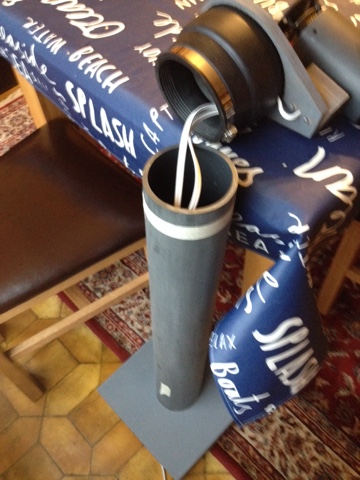
Now it was time to assemble the woofer tube to the base, and then the rubber coupler to the woofer tube. This is/was made difficult by the need to run the wires through the base, whilst not actually connecting the coupler to the woofer tube. Fortunately the dining room table is about the right height to support the heavy speaker assembly whilst the tube and base are unstressed and can be assembled.
 |
| Speaker units resting on table |
I used the "dodgy" glue because it's pretty darned good on anything but EPDM, and can be more easily applied than the pretty gloopy acrylic stuff. I also checked the tube's orthogonality using a set square, and pounded it into the hole with a rubber mallet!
What I haven't included pictures of is the teasing out of the two 1' x 2' pieces of MDM4 wadding - that was a major component of the time, and was pretty tiring, just pulling at the wadding to open it up. Eventually I got it done, rolled up and stuffed down the woofer tube...
At which point I was able to put the coupler on the woofer tube and tighten the stainless steel band. Hurrah!
 |
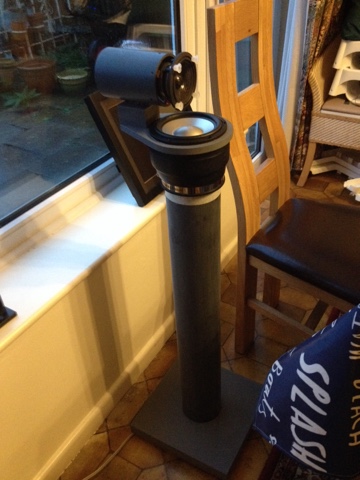
| Completed speaker assembly |
And here's the result. I still have to remove the draughting tape that marks the 1" level of the coupler on the tube, and fill the coupler and base wire holes with sealant. Then it's done!
I'm really impressed - it looks great, really solid, and the colours work brilliantly, giving a kind of solidity and technical "function over form" appearance. It's not an eyesore, and quite neutral.


It looks good, but how does it sound? I guess you won't hook it all up until the other ones done?
ReplyDelete